This how-to guide explains how to move or migrate a PRTG installation from an old to a new server. The server can be a virtual machine or a physical machine. The following steps are valid
If you need more details or more in-depth information about migrating PRTG, for example, if you run PRTG in a cluster, see our Knowledge Base article.
Get full visibility with real-time dashboards, alerts, and customizable sensors
To migrate a PRTG installation successfully, make sure that you install the same PRTG version on your old and new system.
You may need to run an update of the old system to the latest PRTG version first.
If you migrate PRTG from a 32-bit system to a different 32-bit system, or from a 64-bit system to a 64-bit system, you can immediately jump to the 9-step guide.
For a migration from a 32-bit system to a 64-bit system, or vice versa, please follow these steps:
Note: It is important that you back up your system before manipulating the Windows registry!
On the new system, check the login credentials for the PRTG core server service and the PRTG probe service. Be sure to use the same account for both services as on the old system. If you used individual credentials, the following steps are necessary:
Note: The PRTG core server service and the PRTG probe service run under the Local System account by default. This might result in issues with script sensors, because in some cases, the Local System account does not have access to the network or other systems. Please use an account with the required permissions.
After you prepared the migration, you can now move PRTG from the old to the new server. Take the following steps:
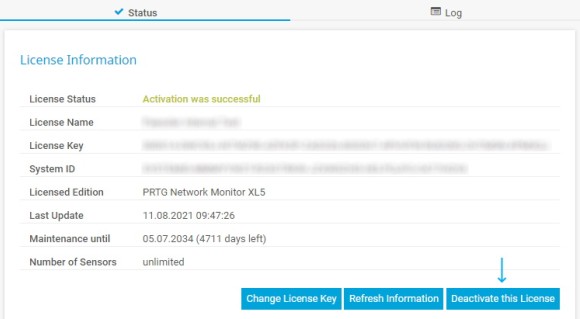
On your original server, go to the PRTG web interface and deactivate your PRTG license under Setup | License Information. Otherwise, you cannot activate the license on the new server. Your old server will still run as a licensed version for 30 days.
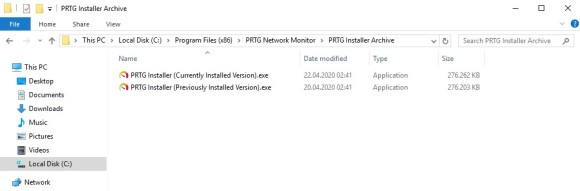
Install the same version of PRTG that you run on the old server on the new server using the installer of the old server. By default, this installer is stored in the PRTG program directory:
During the installation you will need your license name and license key.
Custom alerts and data visualization let you quickly identify and prevent all kinds of issues
Open the PRTG Administration Tool on the old server and on the new server and stop the PRTG Core Server Service and the PRTG Probe Service on both servers.

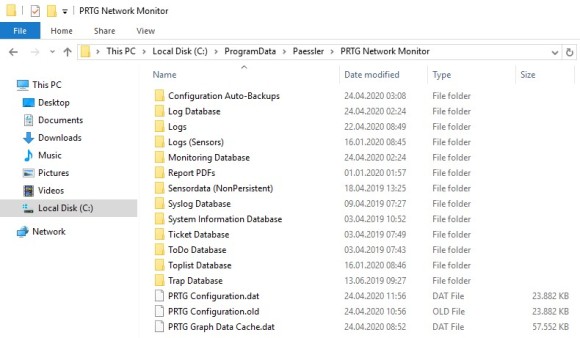
Go to the data directory of your old server and copy the contents of
to your new server. Make sure that the file paths match.
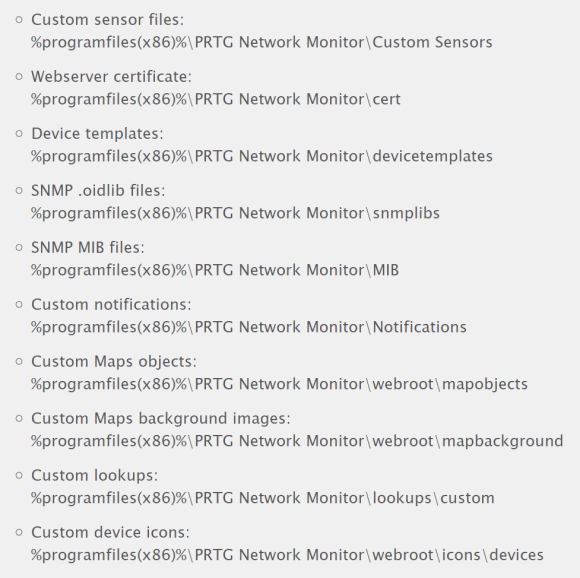
If you use customizations like custom device icons, custom sensors, or certificates, go to the program directory of your old server and copy the respective content to the new server as well.
After copying all the data you need, open the PRTG Administration Tool on the new server and restart the PRTG Core Server Service and the PRTG Probe Service.
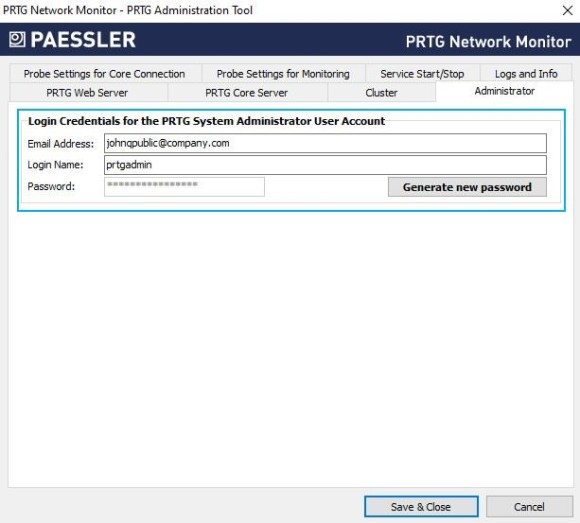
The migration reverts the credentials for the PRTG System Administrator account to the default username and password, prtgadmin.
We strongly recommend to change the credentials in the PRTG Administration Tool of the new server as soon as possible.
For the PRTG web server, check the correctness of the PRTG Web Server settings like the selected TCP port and the specified IP addresses.
You can either do this in the PRTG Administration Tool or in the PRTG web interface under Setup | System Administration | User Interface.

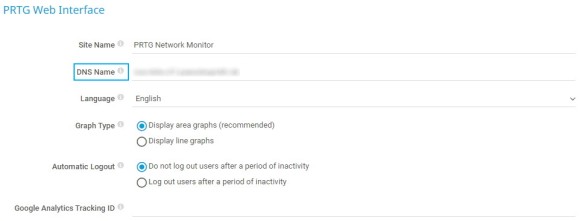
In the PRTG web interface, go to Setup | System Administration | User Interface, section PRTG Web Interface.
Enter the DNS Name so that it points to the fully qualified domain name (FQDN) of the new server.
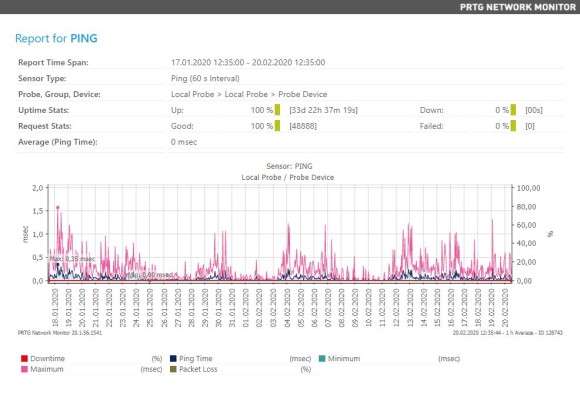
Finally, check whether all your sensors behave as expected. A historic data report might be useful to confirm that all the required historic data is available.
For the report, right-click on a sensor, go to Historic Data | View Historic Data, enter your time period and click Start.
And that’s it! Now you can use PRTG on your new server as usual.